Cómo Instalar una eSIM en tu iPhone: Guía Paso a Paso
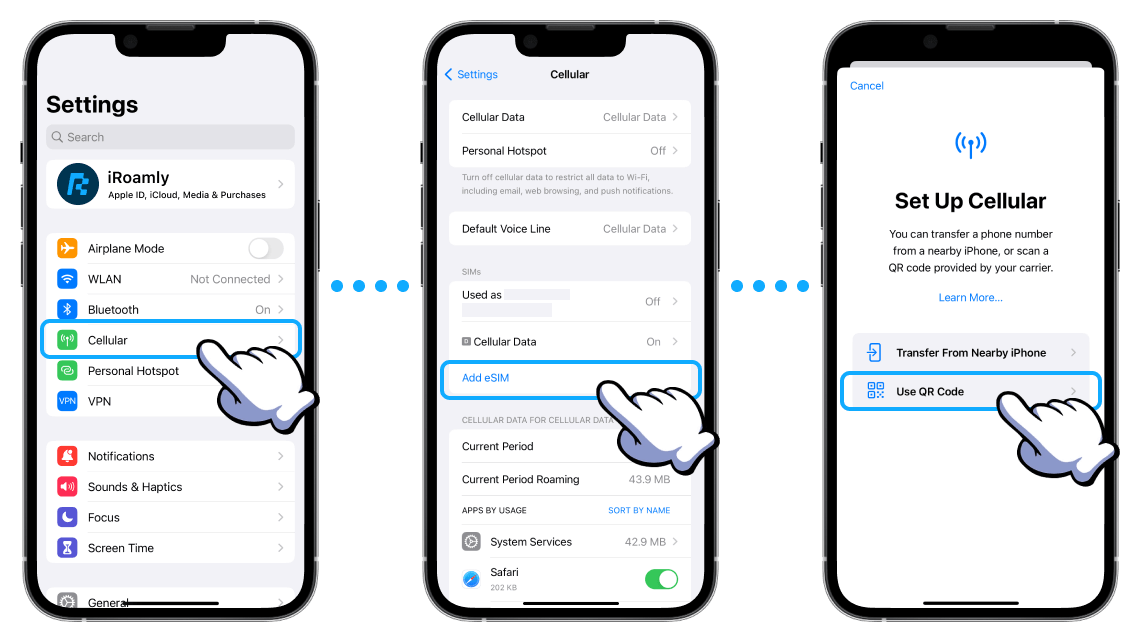
Para instalar eSIM en tu iPhone usando el método de Código QR, sigue estos sencillos pasos:
1. Iniciar Instalación de eSIM:
- Ve a 'Configuración > Celular' (o 'Móvil'), luego toca en 'Agregar Plan Celular' o 'Agregar Plan de Datos Móviles'.
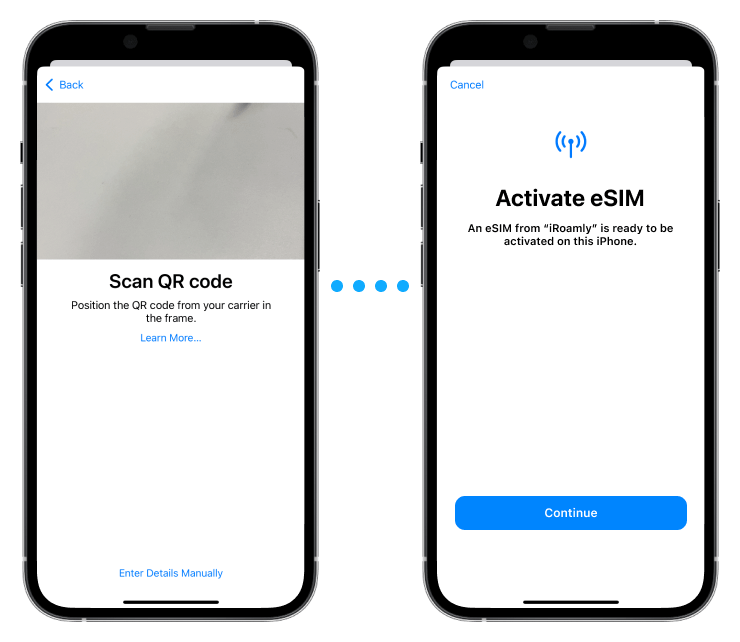
2. Escanea el Código QR:
- Usa la cámara de tu iPhone para escanear el Código QR de la eSIM proporcionado. También puedes guardar el código QR de la eSIM en tu teléfono y luego cargarlo desde el álbum de fotos.
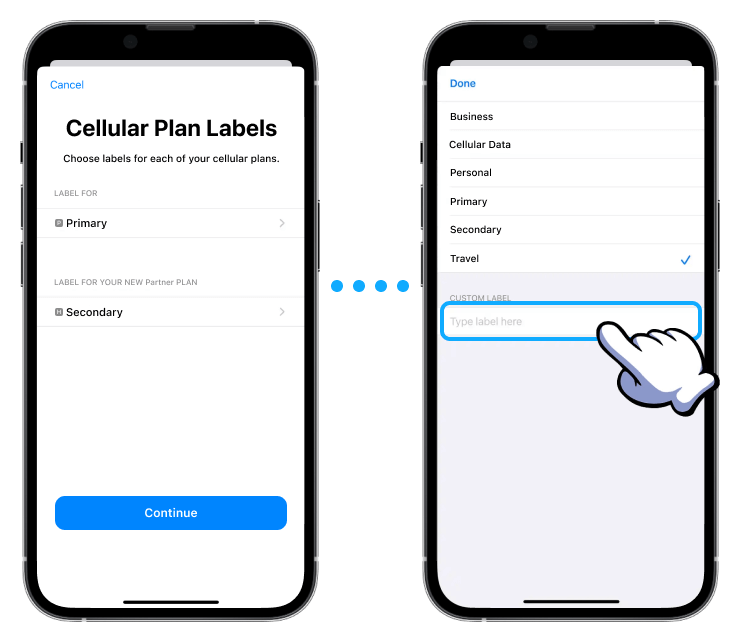
3. Etiqueta tu eSIM:
- Después de escanear, asigna una etiqueta a tu eSIM para identificarla fácilmente. Puedes elegir entre etiquetas predeterminadas o crear una personalizada.
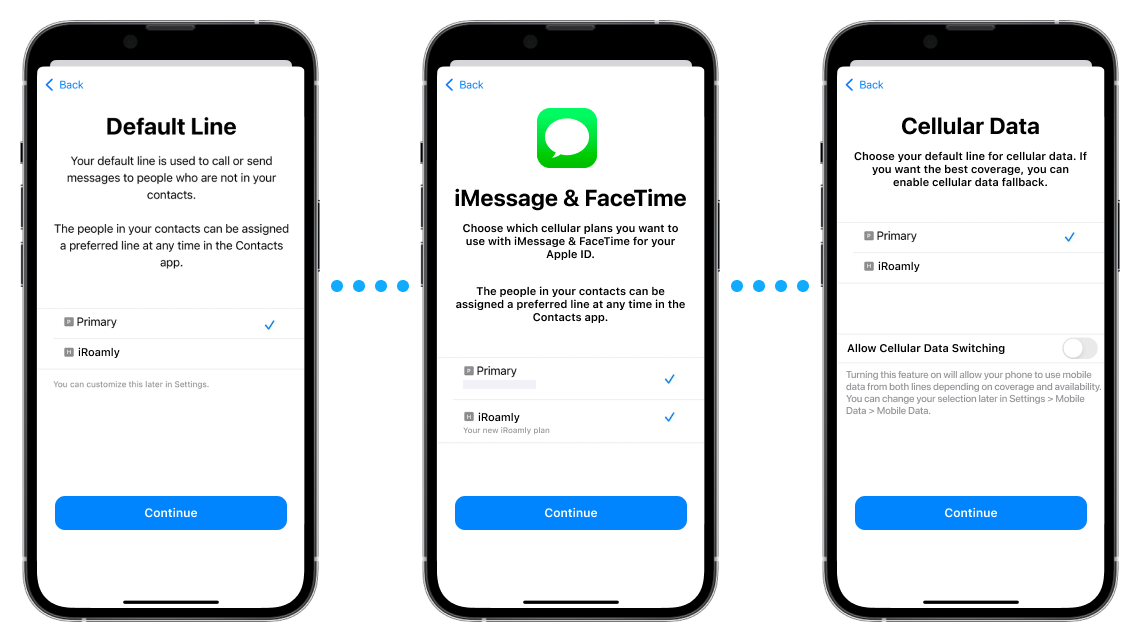
4. Configura la Línea Predeterminada:
- En la página 'Línea Predeterminada', selecciona tu eSIM para el uso de datos celulares.
5. Finaliza la Configuración:
- Tu nueva eSIM debería aparecer ahora en la configuración de tus Planes Celulares o de Datos Móviles.
Para Instalación Manual:
Si el código QR no está disponible, selecciona 'Ingresar Detalles Manualmente' en la configuración de la eSIM e ingresa la Dirección SM-DP+ y el Código de Activación proporcionados por tu proveedor.
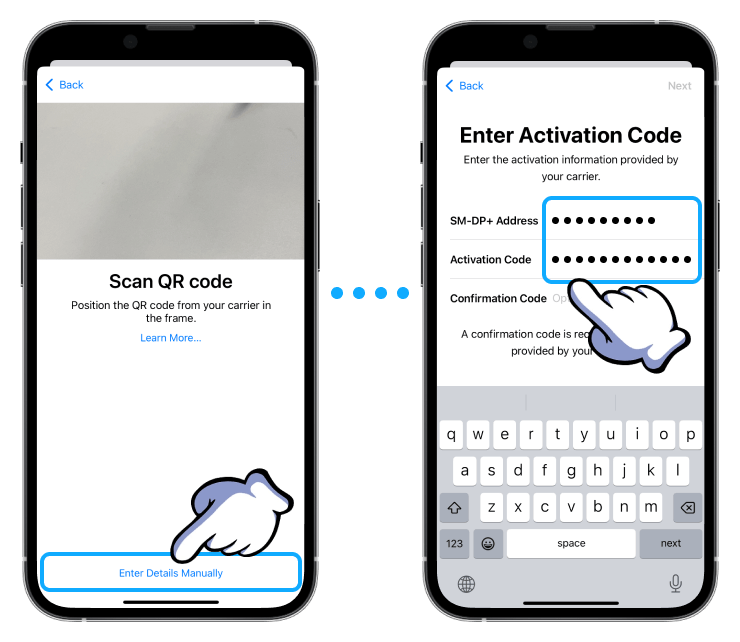
Activando y Accediendo a Datos:
1. Activa la Línea eSIM:
- Navega a 'Configuración > Celular' (o 'Móvil'), toca en tu nuevo plan eSIM y activa 'ENCENDER ESTA LÍNEA'.
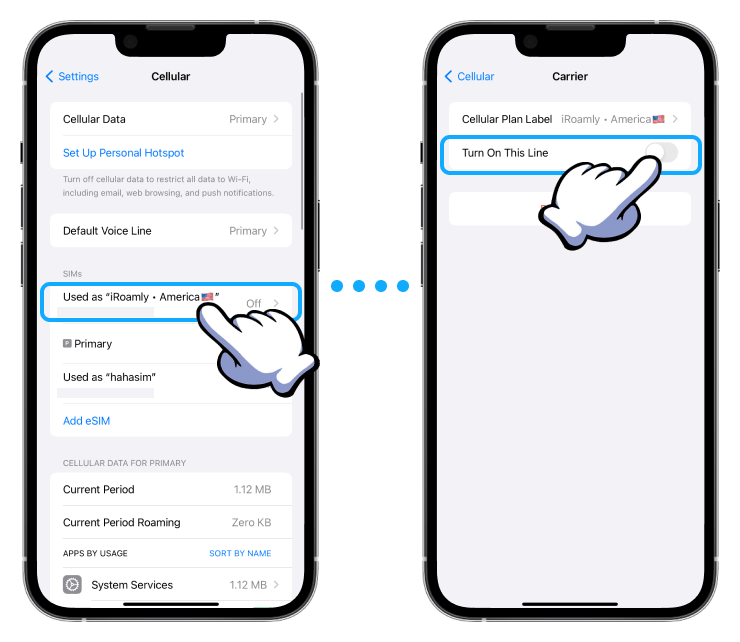
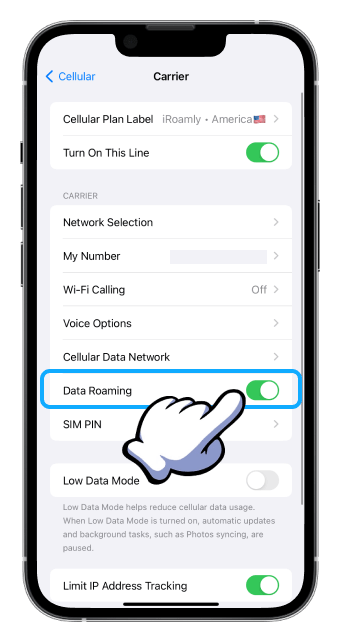
2. Habilita la Itinerancia de Datos:
- Aún dentro de la configuración de tu eSIM, asegúrate de que la 'Itinerancia de Datos' esté habilitada si es necesario.
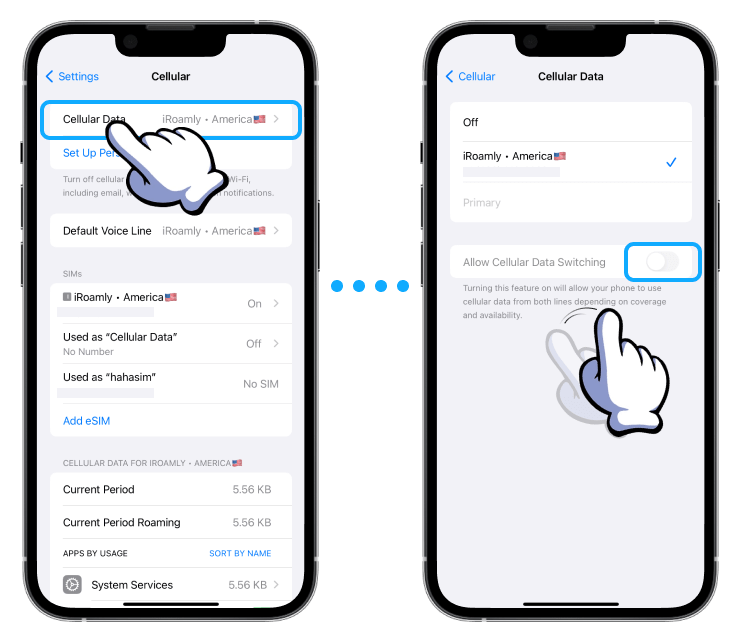
3. Configura los Datos Celulares:
- Regresa y selecciona tu eSIM para 'Datos Celulares' o 'Datos Móviles'. Desactiva 'Permitir Cambio de Datos Celulares' para evitar cargos no deseados en tu línea principal.
4. Elige la Red:
- Dentro de la configuración de tu eSIM, selecciona la red apropiada según las pautas de instalación de la eSIM.
Estos pasos deberían ayudarte a instalar y activar con éxito tu eSIM en tu iPhone, listo para su uso.